- Medium damage,
- Big recoil (Quake2 Uzi like),
- Big spread that will grow when you are firing,
- Weapon can heat,
I will use assets from JonLundy3d he have a lot of great sci-fi assets!
Implementation - core
You will need to set Weapon_Rifle socket to HeroFPP skelmesh and MuzzleFlash socket on static mesh. You should know how to do that if you were reading earlier posts.
MuzzleFlash
I will use P_AssaultRifle_MF and disable those emitters: LongVelocity, ShortBurst, MediumRange, ShortFirey, ShortFireyTinyCore, Particle Emitter (this with mesh data)
Assing MuzzleFlash in your ChangeWeapon function.

Trail
Create a copy of Rail_Projectile and name it Rifle_Projectile. For Trail use P_AssaultRifle_Trail.
Add new variable: Rifle_Spread as a float.
Create new function Add_Spread. (I know we did that earlier but here we need data from MuzzleFlash socket and not player rotation)

Impact Effect
Just use P_AssaultRifle_IH and disable those emitters: ShortBurst, ShortBurst, LongResidual, LongResidual, Burst_Out. Assing this particle in Rail Hit event from Rifle_Projectile.
Sounds
For shooting use this cue: AssaultRifle_Cue. In main MyCharacter BP you will see that I'm using this cue.
HUD
Final Effect
In next post we will add special weapon that you can fire and control the bullet.
 |
| JonLundy3d rifle and pistol. |
You will need to set Weapon_Rifle socket to HeroFPP skelmesh and MuzzleFlash socket on static mesh. You should know how to do that if you were reading earlier posts.
Open HeroFPPAnimationBlueprint and add new variables:
- Rifle_HiRotation (float)
And in Event Graph set Rifle_HiRotation from MyCharacter Rifle_HiRotation - you should know how to do that from earlier post.
Now go to AnimGraph and do something like that:

Now go to AnimGraph and do something like that:
Bone to modify: b_root,
Rotation TranslationMode - replace,
Open MyCharacter and add new weapon to WeaponTypes ENUM. Open MyCharacter and add new variables:
- Rifle_Pressed (bool),
- RifleDamageMax (int),
- RifleDamageMin (int),
- RifleRateOfFire (float 0.1),
- RifleHeatSpeed (float 0.2),
- Rifle_MaximumSpread (float -0.3)
- Rifle_Spread (float -0.1),
- Rifle_HiRotation (float),
- Rifle_DeltaTime (float),
- Rifle_HeatLevel (float),
- Rifle_HiRotationTarget (float -15)
- Rifle_MF (ParticleSystemComponent),
- Rifle_SpreadChanged (float),
- Rifle_HiRotationSpeed (float 1.0),
- Rifle_HiRotationPlayer (float 15),
- Rifle_PlayingAnimation (bool)
There is a lot of blueprinting here so first I will show you my BP and then will try to explain.
We need to change Input Events like here:


We need to change Input Events like here:
We need to know when we are holding fire and when releasing.
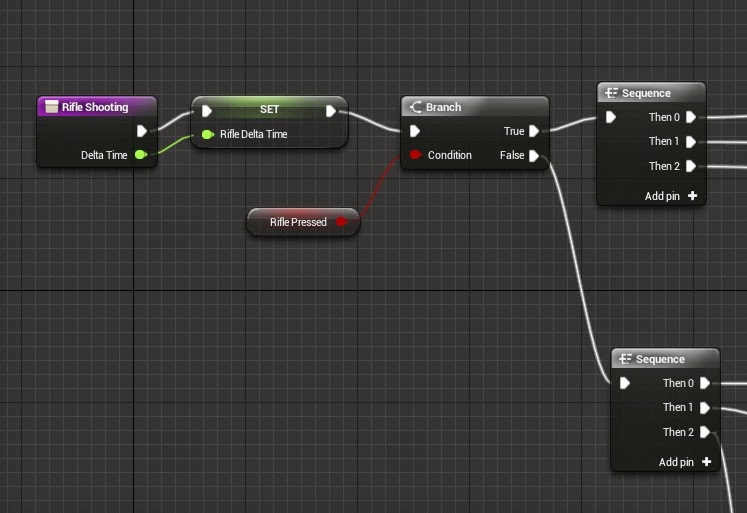
Then create RifleFire Function - it will be big one.
Then create RifleFire Function - it will be big one.
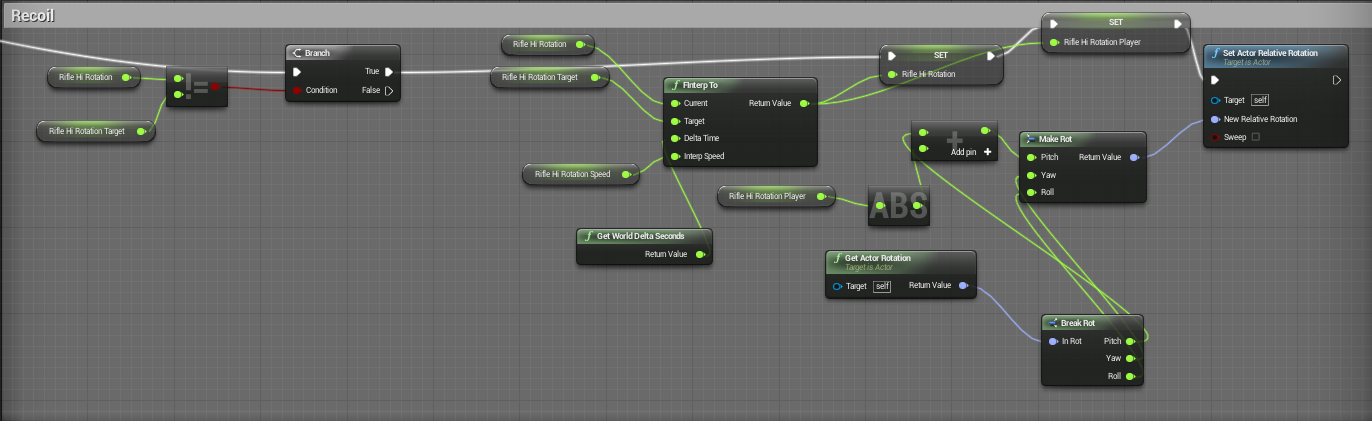
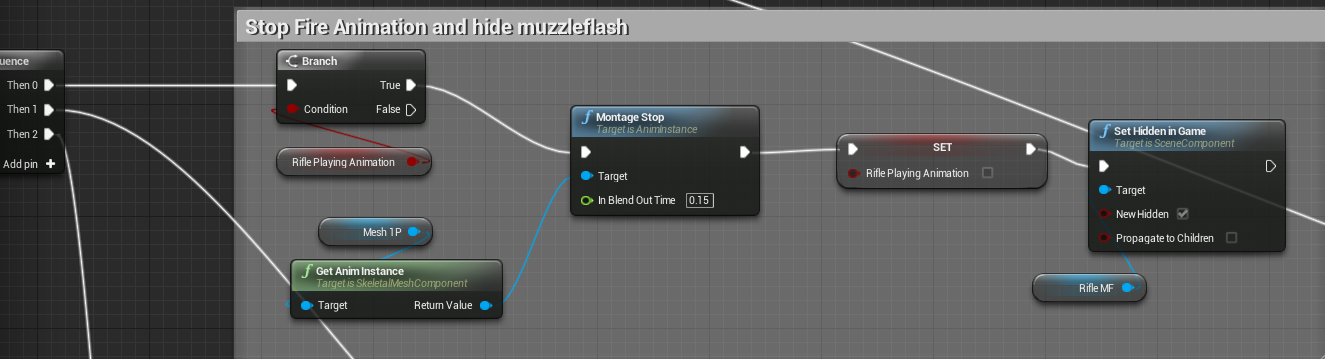
Next part: TRUE -> THEN 0:
Next part: TRUE -> THEN 1:
Next part: TRUE -> THEN 2:
Next part: FALSE -> THEN 0:
Next part: FALSE -> THEN 1:

Next part: FALSE -> THEN 2:

Now get out from RifleFire function and go to MyCharacter main EventGraph.
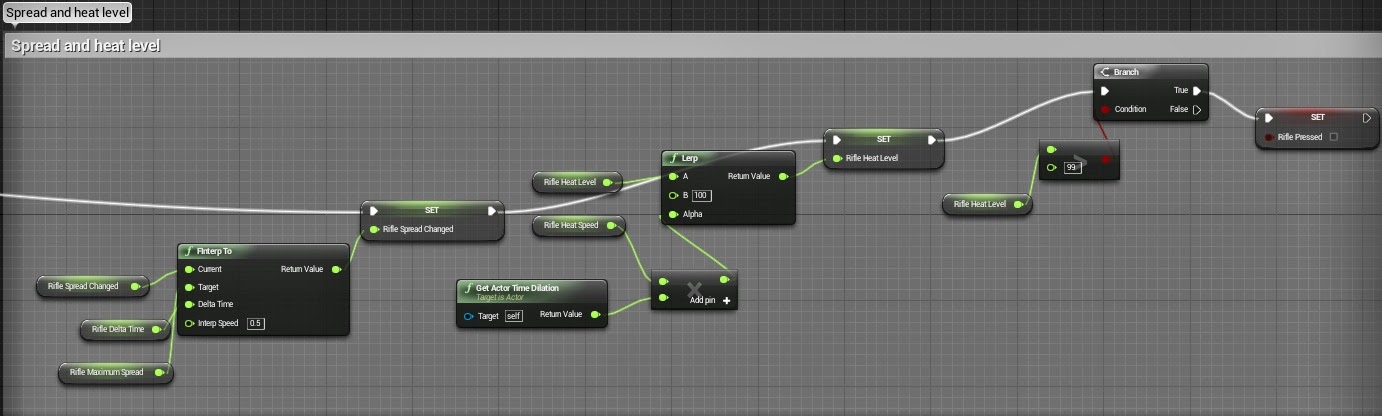
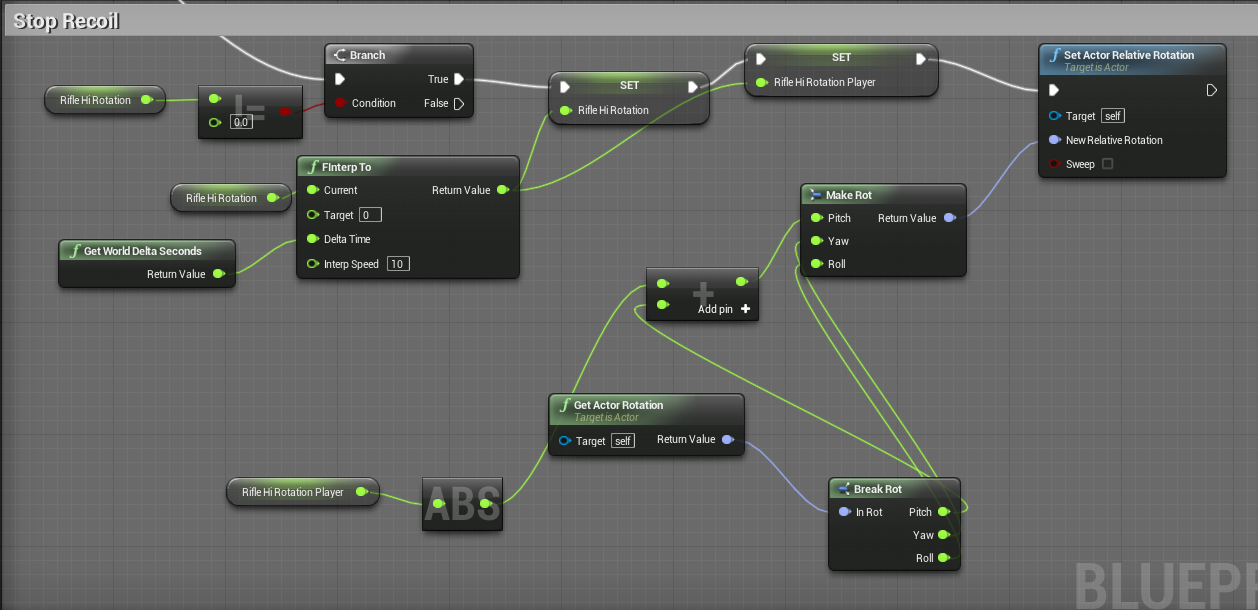
So basically we are checking when we are holding finger - increase rotation, play weapon animation, spawn projectiles, effects and increase heat. When we release our finger we are disabling all of the effects. When heat is to big we are disabling shooting. BP looks complicated but it's really easy - try to analyze it and create such functionality by yourself!
As far I can know Epic is working on Copy/Paste blueprints system, hope they will finish it soon so it will be easier to show you how to create such things.
As far I can know Epic is working on Copy/Paste blueprints system, hope they will finish it soon so it will be easier to show you how to create such things.
MuzzleFlash
I will use P_AssaultRifle_MF and disable those emitters: LongVelocity, ShortBurst, MediumRange, ShortFirey, ShortFireyTinyCore, Particle Emitter (this with mesh data)
Assing MuzzleFlash in your ChangeWeapon function.
Trail
Create a copy of Rail_Projectile and name it Rifle_Projectile. For Trail use P_AssaultRifle_Trail.
Add new variable: Rifle_Spread as a float.
Create new function Add_Spread. (I know we did that earlier but here we need data from MuzzleFlash socket and not player rotation)
Move to main EventGraph and add this:

Impact Effect
Just use P_AssaultRifle_IH and disable those emitters: ShortBurst, ShortBurst, LongResidual, LongResidual, Burst_Out. Assing this particle in Rail Hit event from Rifle_Projectile.
Sounds
For shooting use this cue: AssaultRifle_Cue. In main MyCharacter BP you will see that I'm using this cue.
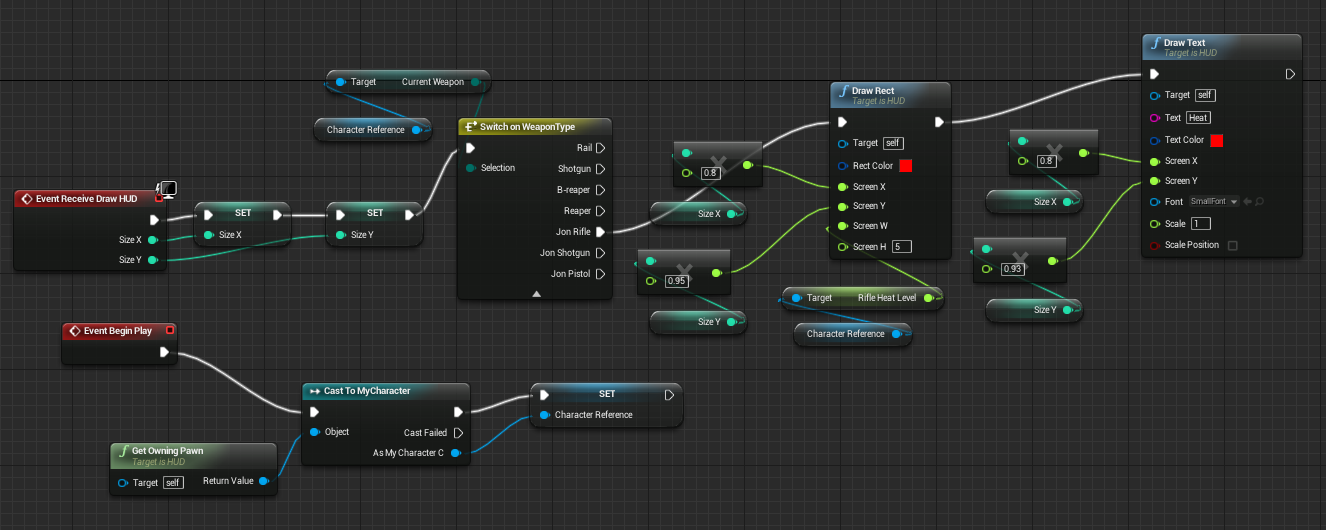
HUD
Go to MyHud add two int variables: SizeX, SizeY.
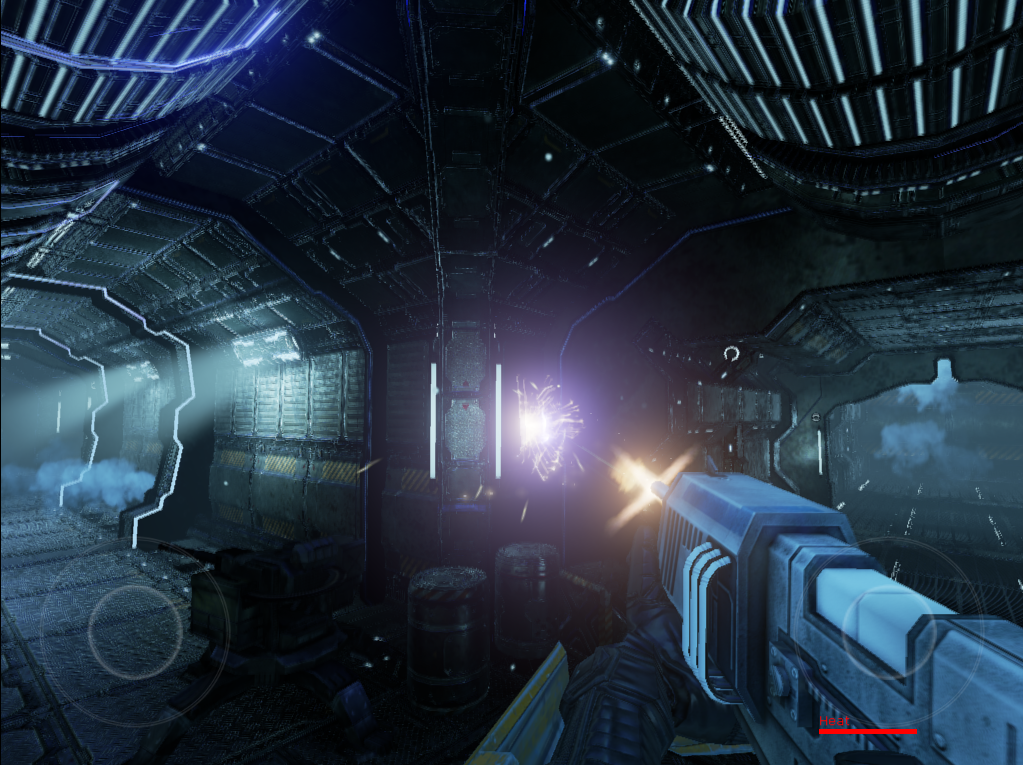
Final Effect
No comments:
Post a Comment